Built not bought - How I built a ride-on LEGO car
Some of you may remember me as the person behind this LEGO Koenigsegg Regera and
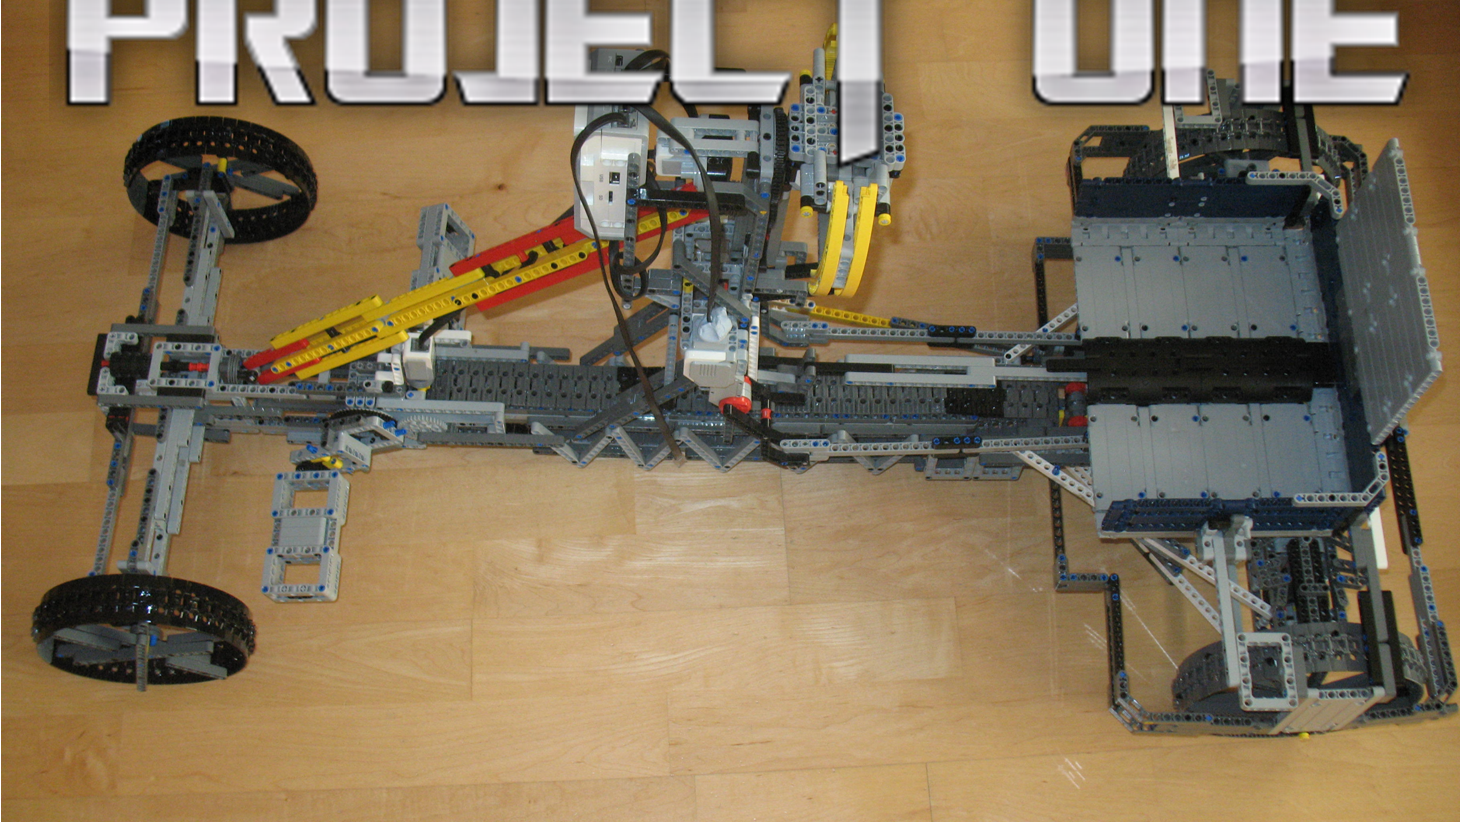
Some of you may remember me as the person behind this LEGO Koenigsegg Regera and this Ariel Atom. I decided to try a larger build, and it’s fair to say I pushed the limits of my collection. This is a 1-metre-long F1-inspired ride-on-car made from nothing but 100% LEGO!
Specification
- Power: pedals at front driving chain.
- Transmission: 8-speed close-ratio sequential, electronically shifted with steering wheel paddles.
- Differential: Rear differential with manually-operated lock. Electronic limited-slip system can be toggled on and off.
- Brakes: Rear disk brakes - twin callipers, rubber pads, 49.2mm disks
- Rims: 190x40mm 12-spoke rear rims, 155x40mm 6-spoke front rims
- Steering: Rack-and-pinion, 2/3 of a turn lock-to-lock, lock is approx 45 degrees each way
- Steering wheel: Wireless steering wheel with two shift paddles, clutch paddles and brake button
- Electronics: MINDSTORMS EV3 brick for control system and display, 2 L motors for brake operation, 1 L motor for gearbox shifting, 1 M motor for differential control system, 1 Touch Sensor for RPM measurement, 1 IR Receiver to get wireless commands from steering wheel.
So a spec sheet rivalling a real F1 car… almost. Let’s look at the parts in detail:
Drivetrain
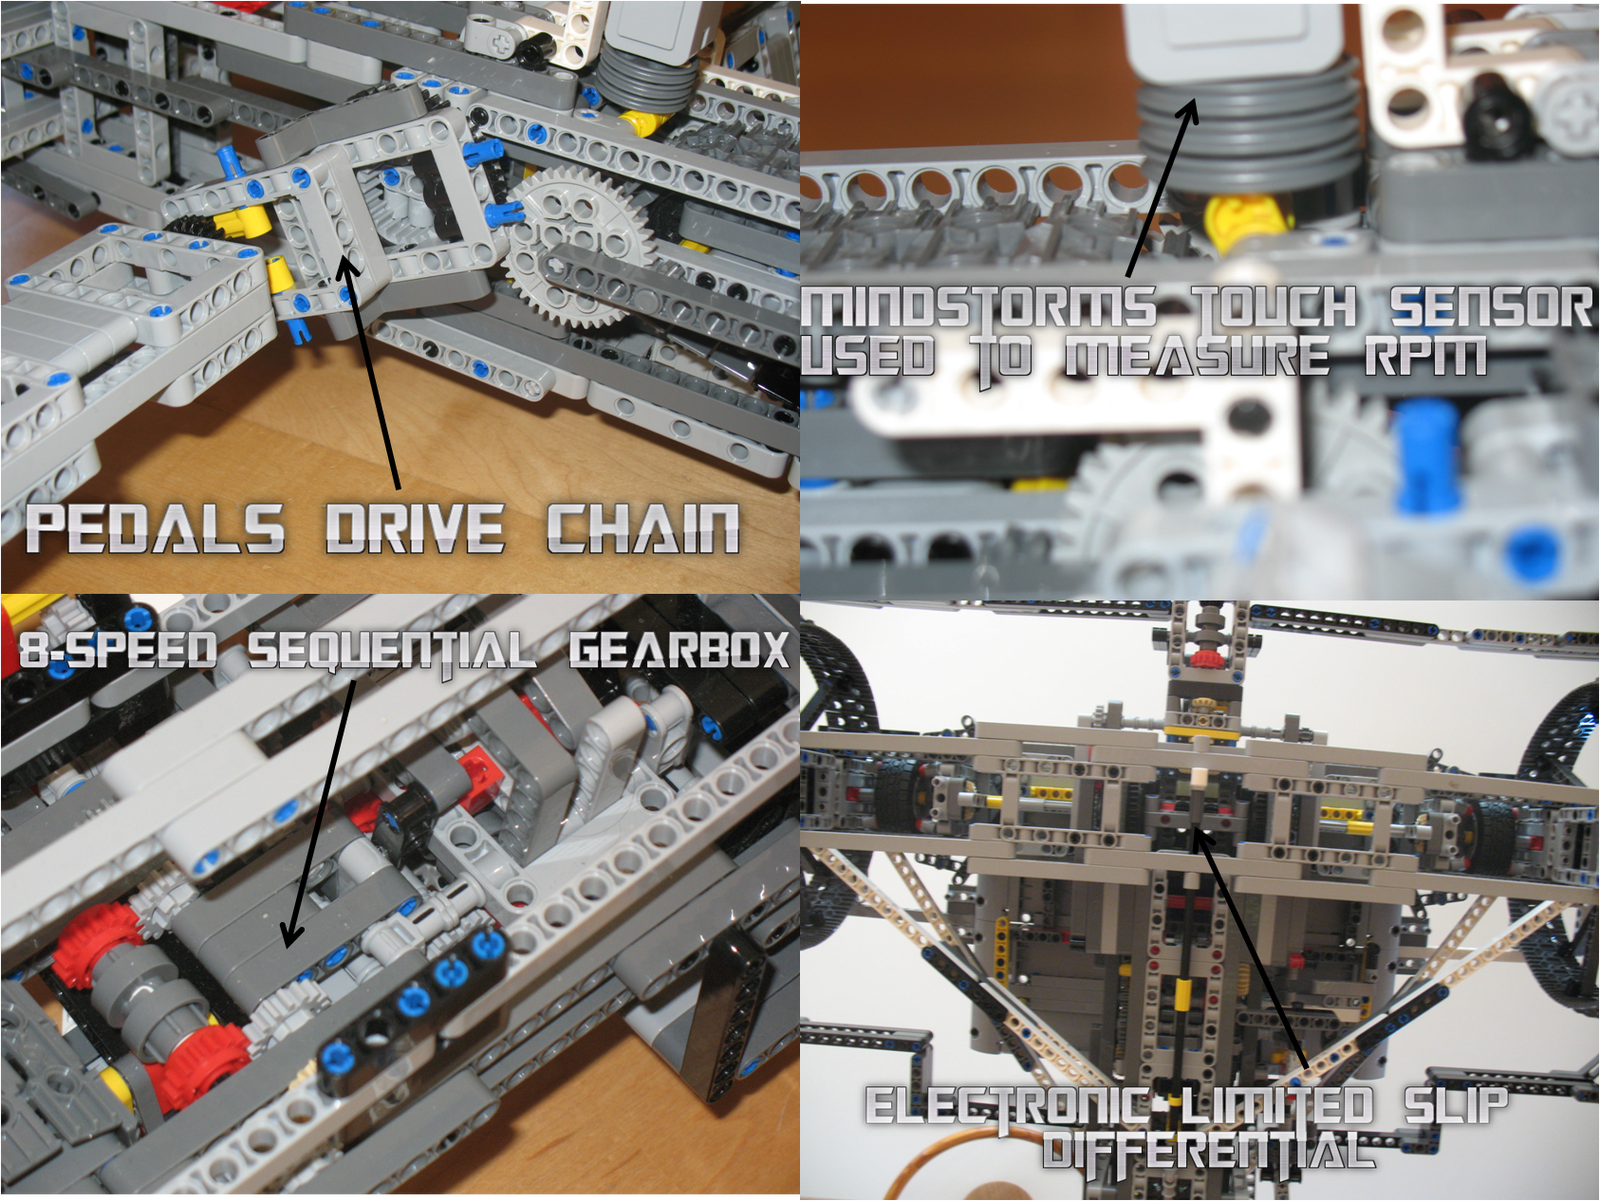
The pedals drive a chain which goes to the gearbox. The gearbox is made up of a 4-speed coupled to a 2-speed close-ratio gearbox for 8 distinct speeds, each separated by around 25%. The gearbox and chain are geared up quite high to reduce the amount of torque they have to deal with at the expense of overall efficiency. This is needed when dealing with a pedal-powered vehicle this size. The gearbox is controlled by a single Large motor with a Geneva mechanism (something you’d find in an old car odometer or a clock) to control both mini-gearboxes simultaneously.
A small cam bumps the Touch sensor every 1/7th of a pedal revolution. This allows the main controller to calculate the pedal RPM which is displayed. This is also used to calculate wheel speed and percentage differential slip (more on that later).
The central differential is extremely sturdily built. However, a small differential is also connected to the outputs - this measures the difference in speed between the outputs. Its shaft goes to an M motor used as a rotation sensor to detect how much slip is happening. If the slip exceeds a certain threshold, the controller brakes the wheel travelling faster. This is the same principle as that on the McLaren P1. There is also a manual differential lock.
Brakes and wheels
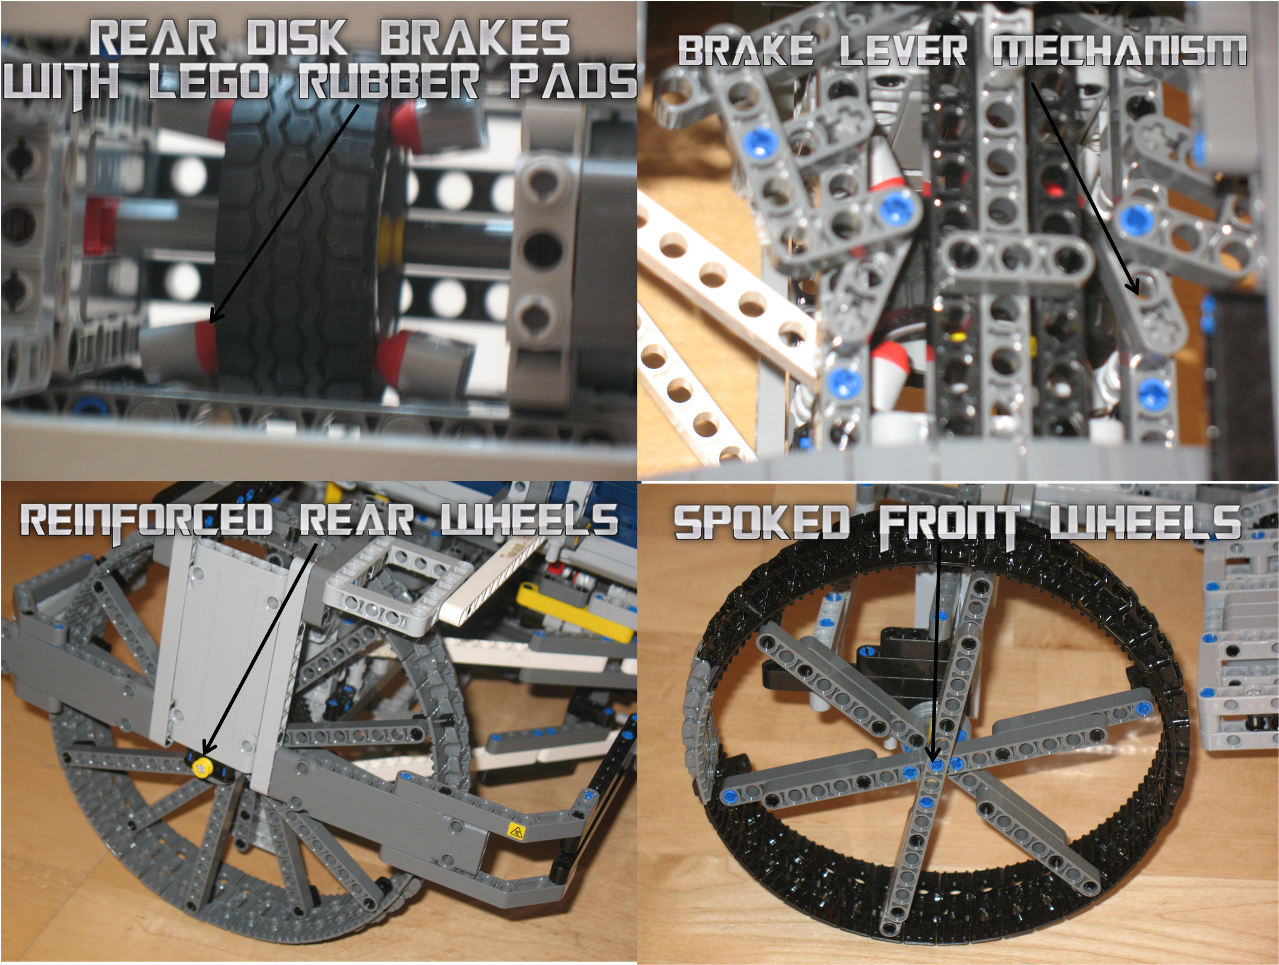
The disk brakes use a 49mm LEGO wheel and tyre as the disk and red LEGO rubber parts as the pads. There are two sets of callipers on each wheel (4 pads per wheel in total) giving huge stopping power - more than enough to lock the wheels. A rather complex linkage allows a single motor to control both sets of callipers at the same time.
The wheels are made from LEGO tank-treads bent backwards into a loop. This is pretty much the only way to build large, sturdy LEGO wheels. The rear wheels get more spokes and a much tighter setup because they have to deal with the driver’s weight.
Steering
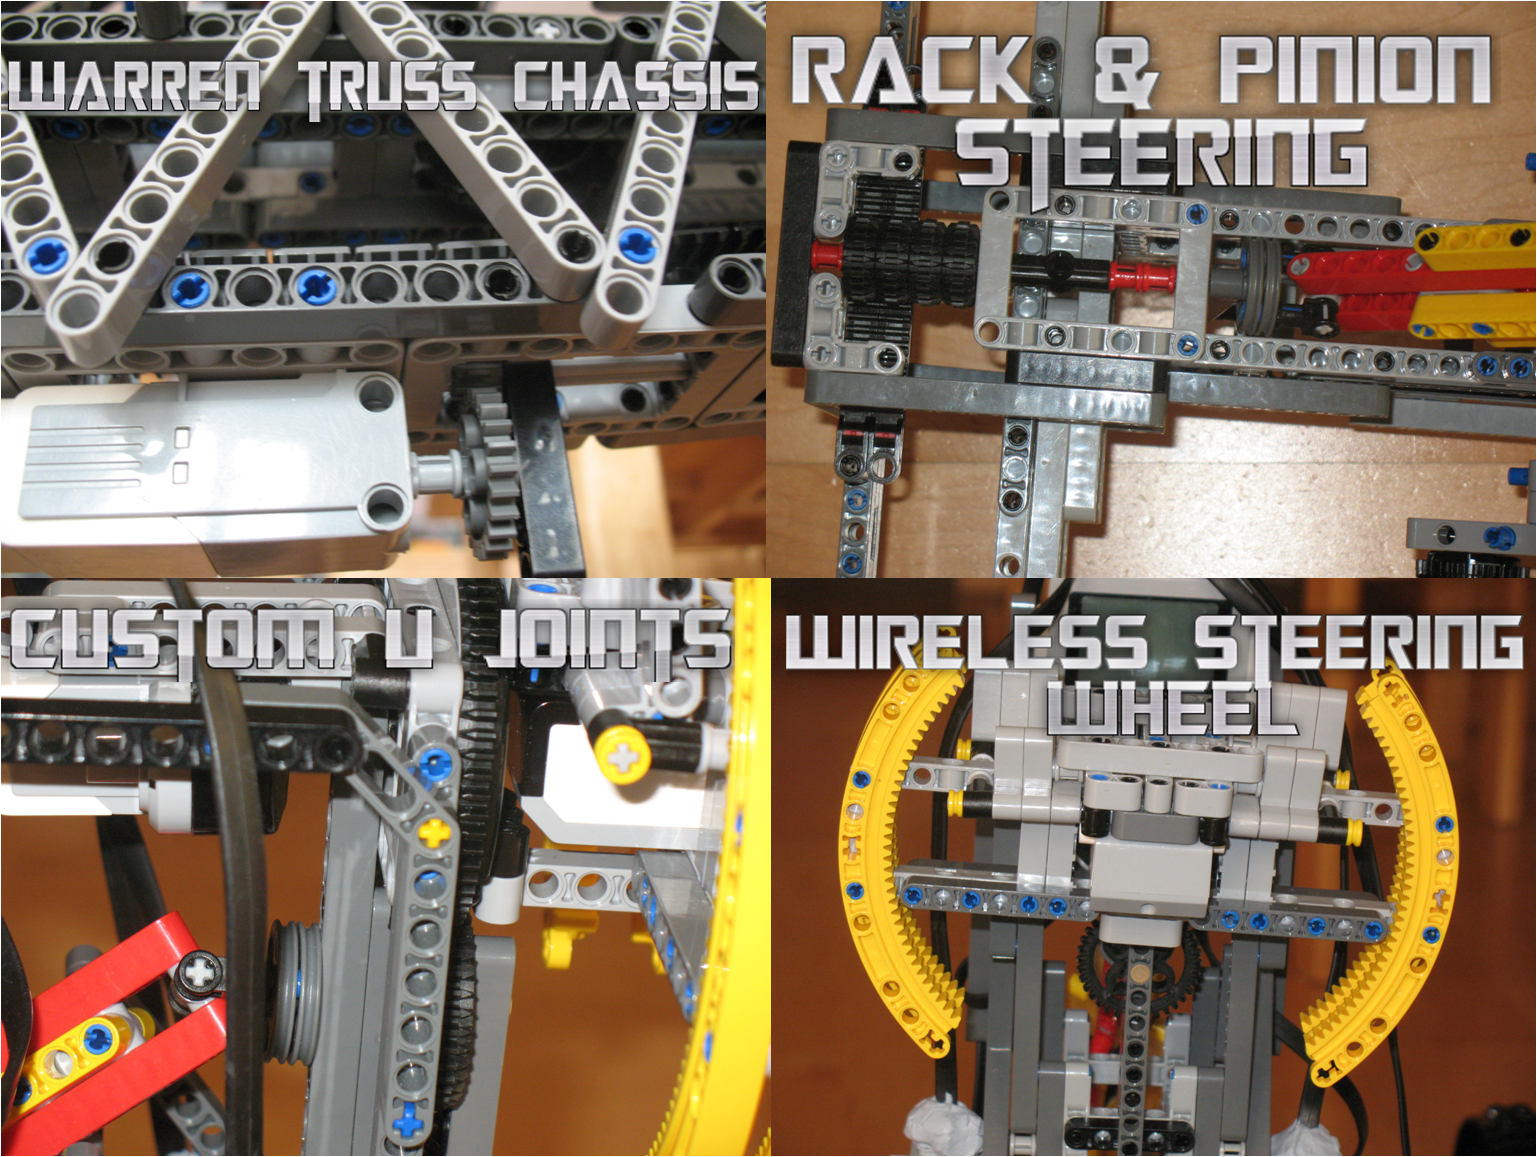
The steering is standard rack-and-pinion. The steering wheel is connected to the rack via custom heavy-duty U-joints made from regular LEGO pieces. It has about 2/3rds of a turn from lock to lock - marginally more than a real car. However, the maximum wheel angle is much higher. The steering wheel is designed to resemble an F1 car’s wheel.
Chassis
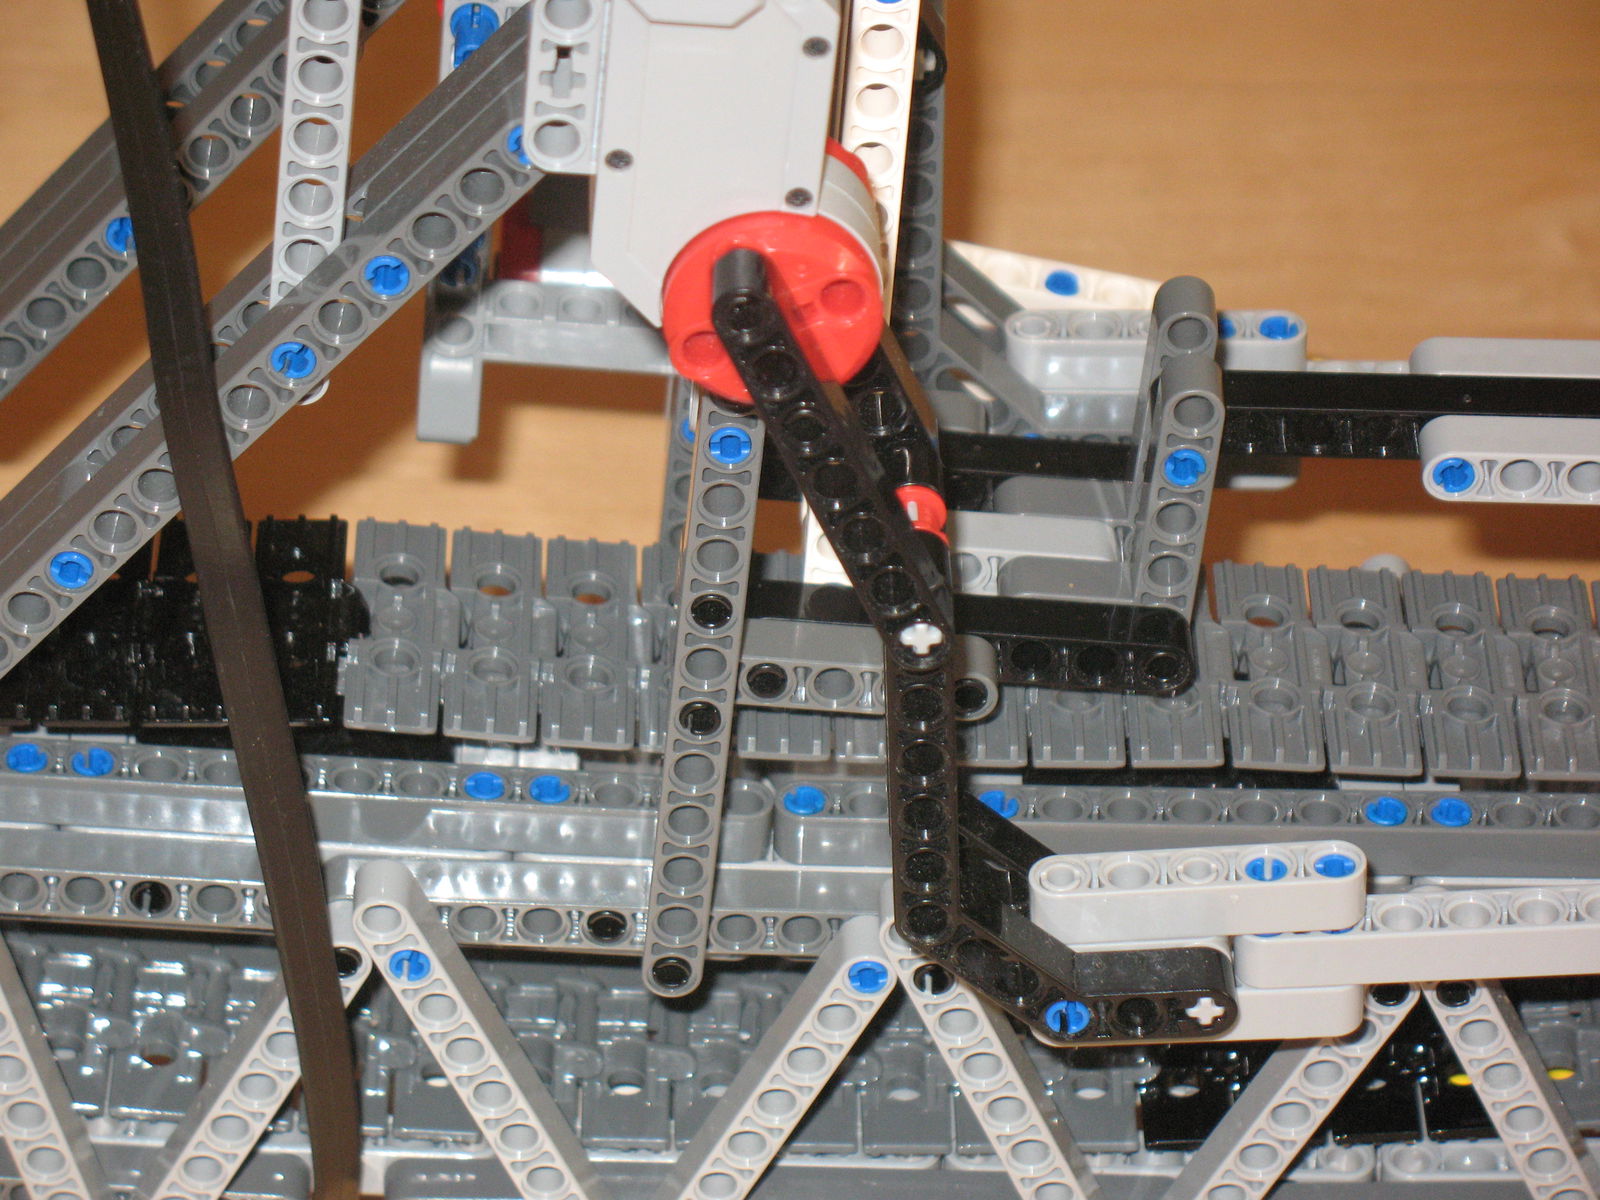
Building a vehicle this large presents new engineering challenges. In my previous smaller builds, it was all about minimising weight and space. This time weight is irrelevant since 90% of the weight is the driver. The goal here was to make the areas that will be under load as strong as possible with the limited pieces I have. In short, I’m building a Volvo instead of a Lotus.
The central chassis uses a Warren truss which is easy to replicate in LEGO. That section is virtually indestructible. This connects the front and rear axles. The front doesn’t look terribly sturdy, but the way the pieces are arranged means it will withstand a considerable amount of downward load. The rear is where most of the reinforcement is since the driver sits directly above it. Because the wheels had a tendancy to gain massive negative camber (stance!) under load and fall off, I had to add supports on the outside of the wheels to keep them level.
The individual chassis sections are extremely strong, but what let them down were the connecting bits. More specifically, the pedal unit and the gearbox. Because of the need to hold gears, reinforcing this part is far more difficut, meaning it can twist a lot. Body roll is quite significant.
Electronics
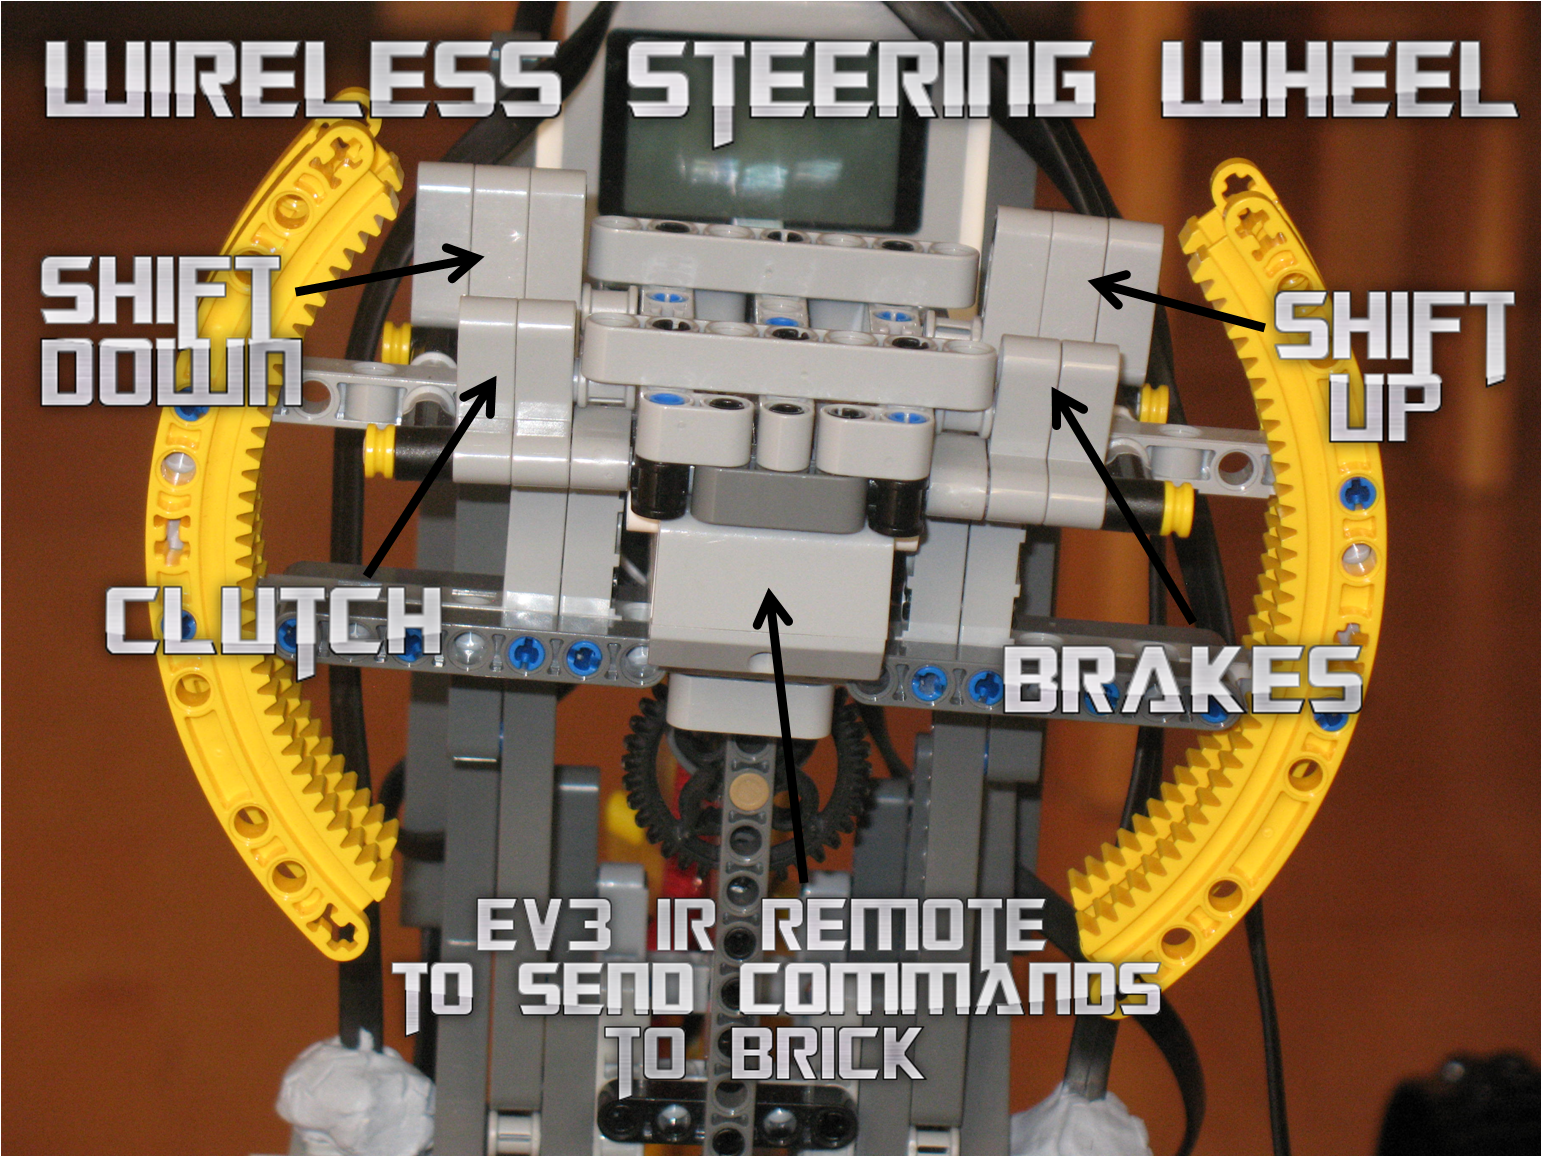
There are four paddles - two for gears, a clutch/neutral and a brake. Each paddle presses a button on the LEGO infrared remote which is in the middle of the steering wheel. Its signal shines through the turntable and is captured by the IR receiver on the other side. This allows signals from the steering wheel to reach the EV3 brick controller wirelessly. The paddles have a very short throw and a crisp feel - they’re one of my favourite parts of the car.
The display shows pedal RPM, wheel speed and gear ratio. There is an RPM bar and a shift indicator (triggered at 80 RPM).
Conclusion
[All music is composed by me. Head to 11:03 for an interesting surprise, or to 12:00 to see me try to sit on the car. If you liked it, please subscribe to my Youtube channel!]
If you’ve watched the video, you’ll find my attempt at sitting on this thing. Which is where it fails. Because anybody old enough to understand all the features of it is probably too heavy for it. In my case, my weight of one Peel P-50 was too much for the rear axle and the seat. One of the wheels also suffered the equivalent of a blowout.
But that doesn’t really matter to me. This was more of a proof-of-concept; a testbed for various ideas I had. Perhaps a version of some of the mechanisms here might filter down into my regular-sized cars (if you’ve got any suggestions, please comment!). Which is ultimately why manufacturers produce concepts, supercars sold at a loss (e.g. Lexus LFA) and non-road-legal production cars (e.g. Ferrari FXX K).

Comments
Now that’s engineering
Wow you really thought about everything!
What
On
Earth
Matt Robinson somebody editor pick this ting
[Matt Kimberley Robinson] Matt Kimberley just give him an editors pick
That’s Brilliant! I can’t get over the sheer size of it!
You should really keep going with this, if you can make it strong enough for a small child to use (maybe 7year olds or younger) it could be sold as an actual product!
Hires you as an engeneer
Wow! I am actually very impressed!
Buy a bootleg m series badge from ebay and put it on the back
How is this not an EP? Matt Robinson Matt Kimberley Alex Kersten Adnan Ebrahim